ASNA Knowledge Base
Technical references, how-tos, and trouble-shooting for ASNA products

The ASNA DataGate for Windows and Servers provides a Windows-hosted database. This database is primarily accessed by ASNA Visual RPG COM or for .NET Framework versions.
It’s common to need to copy a DataGate Windows-hosted database. This article explains how to do that.
First, let’s define two important terms we’ll be using in this article:
Database Label - For Windows-hosted databases, the database label is a handle that associates a Windows DB instance with its physical Windows path.
Database Name - A Database Name identifies a DB instance, and its properties (ie, user id, password, connection pooling, etc), for referencing that DB with Visual RPG.
To copy a Windows-hosted DB, you first assign a label to its top-level root directory and then create a Database Name that corresponds to that label. Here’s how to do it:
The usual use case for needing to copy a local database is to copy an existing database from one PC to another. To determine what the root folder of a source DB’s contents are:
In the COM DB Manager:
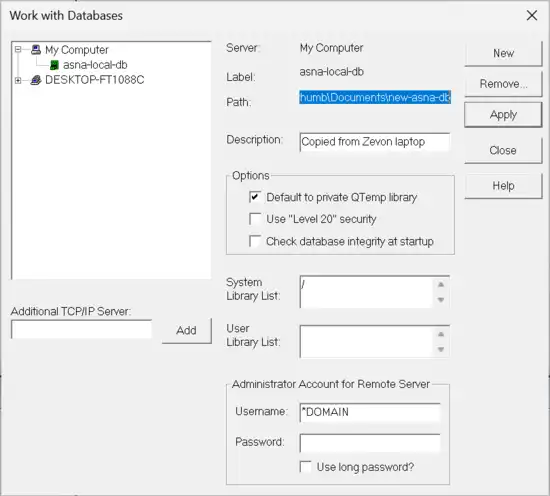
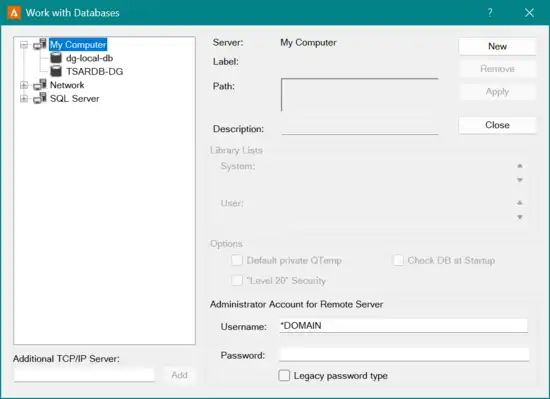
Open the Work with Databases dialog. The full path to the DG contents are in the “Path” label. It’s not very intuitive, but you can select that value with your mouse. Use either the arrow keys or your mouse to select the full path.
In the Visual Studio DataGate Explorer:
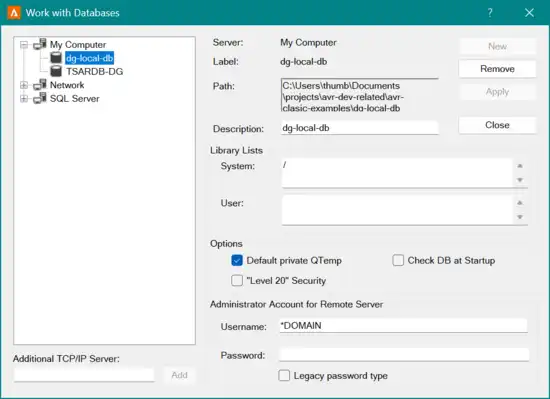
From the main menu, open Extensions->DataGate Explorer->Work with Databases. The full path to the DG contents are in the “Path” label. This dialog is little more intuitive. The full path to the DG contents are shown next to the “Path.” Select the entire path with the arrow keys or your mouse.
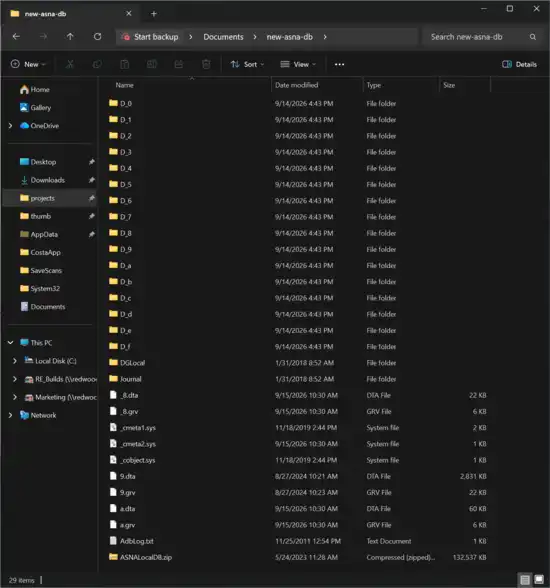
In this example, the source database contents root directory is C:\Users\thumb\Documents\new-asna-db. When you navigate to the DB root in the Windows File Explorer, you see the many folders comprising the database. DO NOT modify anything in any of these folders. Use any technique you want to copy the root folder contents from one PC to another (My favorite way is to right-click the top-level root and select “copy” and then paste that into another target folder (which is often a thumb drive or another network-attached PC to shuffle the DB to another PC.)
While we’re only subject of where the source content lives for an ASNA Windows-hosted database, understand that this top-level folder (
new-asna-dbin this case) is the folder you must be backing up on a regular basis. Do not put your business at risk! Back up your local ASNA Windows databases often! Also, it’s worth saying again, do not manually change any file or folder here.
In the COM DB Manager:
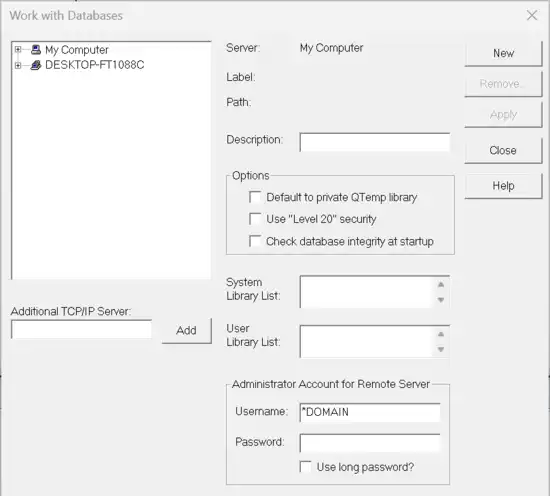
Open the Work with Databases dialog and click the “new” button.
In the Visual Studio DataGate Explorer:
From the main menu, open Extensions->DataGate Explorer->Work with Databases and click the “new” button.
In the COM DB Manager:
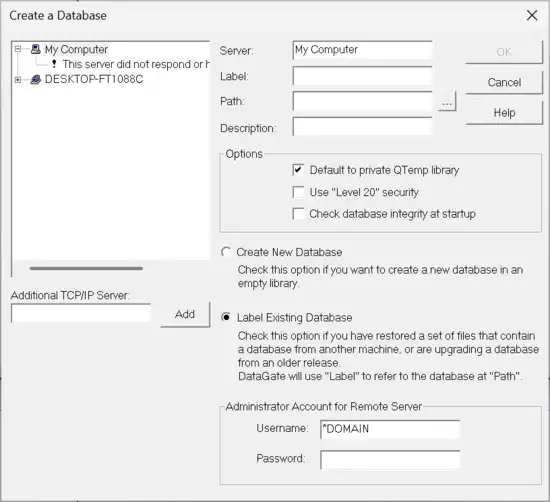
Click the “Label Existing Database” button. Then click the elipses after the “Path” text box.
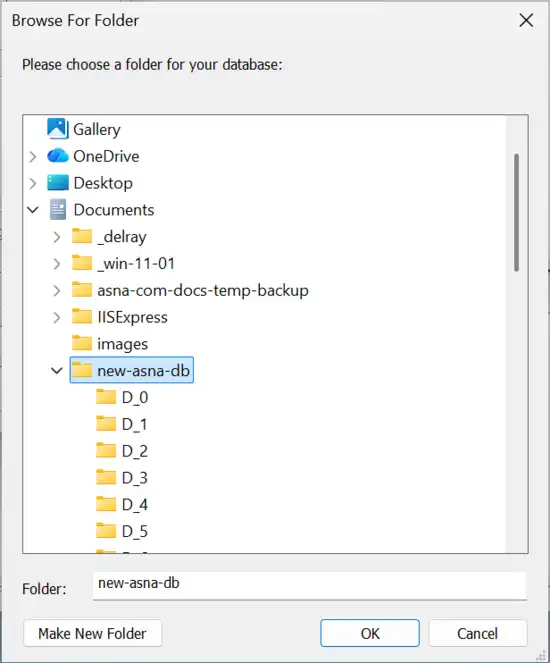
Browser for the top level root directory of your source database. Select it and click “OK.”
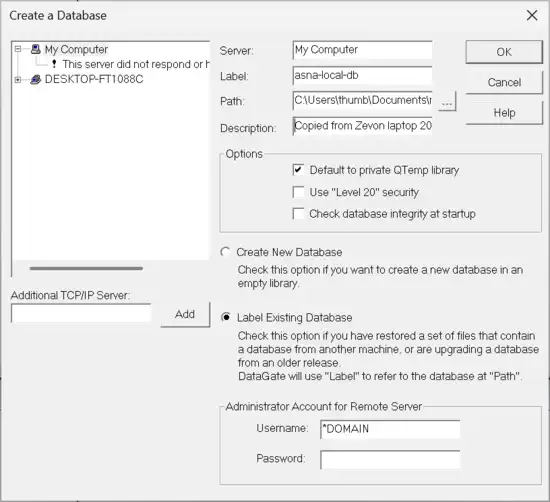
Provide a value for the “Label” and “Description” text boxes. The label you assign will ultimately show in the tree to the left under “My Computer.”
Check the “Default to private QTemp library” if you want IBM i-like QTemp behavior (otherwise QTemp is shared by all users). The “Level 20” button doesn’t apply to the Windows-hosted database. You can check the “Check the database integrity at startup,” but it being checked slows application startup time. Most leave it unchecked.
Do not provide a user name or password. Then click “OK,”
In the Visual Studio DataGate Explorer:
From the main menu, open Extensions->DataGate Explorer->Work with Databases. The dialogs and their options are nearly the same as the COM dialogs.
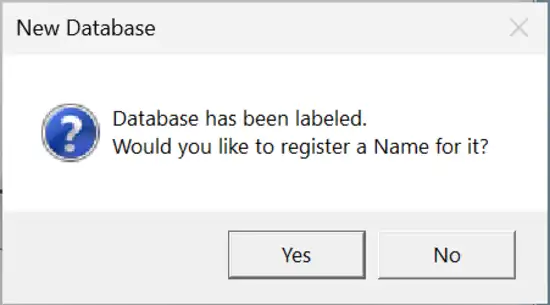
When you click “OK” at the end of Step 3, the following dialog appears. Click “Yes” to create a new Database
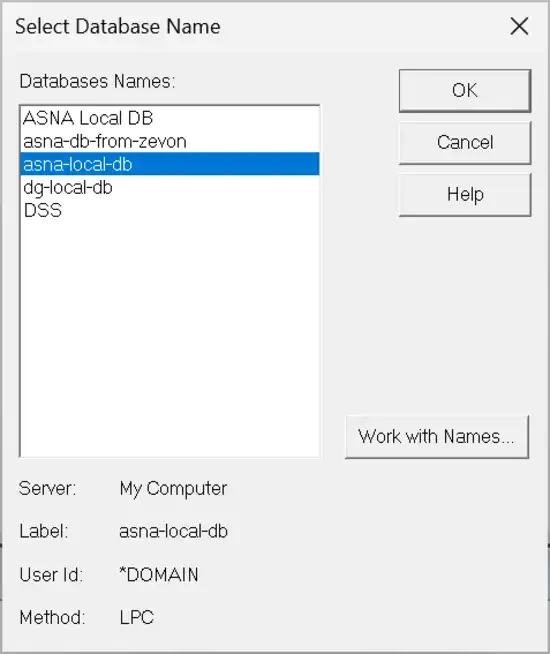
Select the Database Label you just created (from this list of Database Labels in the list) and click “OK.”
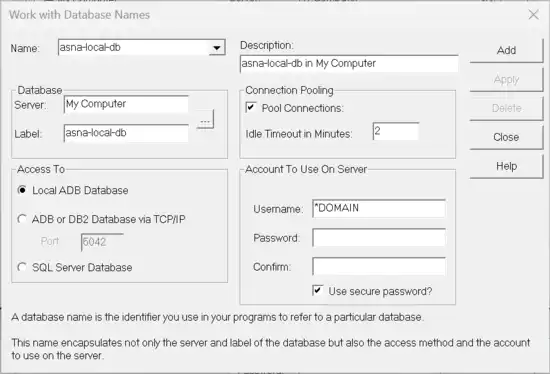
Provide a Database Name in the “Name” combo box. For Windows-hosted databases I use the same name as the Label; but you can use any name you want here. Make sure the “Local ADB Database” radio button is checked. Specify “Pool Connections” only if you are using Web applications. Leave the user name as “*DOMAIN” and do not provide a password. The “Use secure password” is ignored by Windows-hosted databases.
Click “Add” to add the new database name.
In the Visual Studio DataGate Explorer:
The dialogs and their options are nearly the same as the COM dialogs.
Your new database is now available for use.